Red Hat OpenShift AI 3.4 — Minimal Installation Guide
Target: OpenShift Container Platform 4.20 (Web Console install)
Scope: Dashboard + Workbenches only. No model serving (KServe), no pipelines, no distributed workloads. No additional operator dependencies required.
Time required: ~20–30 minutes
Last verified: 2026-07-14 against the official RHOAI 3.4 documentation
1. Prerequisites
Verify all items before starting.
| # | Requirement | How to verify |
|---|---|---|
| 1 | OCP 4.19–4.20 | oc version |
| 2 | Cluster-admin user via identity provider (not kubeadmin) |
oc whoami |
| 3 | ≥ 2 worker nodes, each ≥ 8 CPUs / 32 GiB RAM | oc get nodes -o wide |
| 4 | Default storage class with dynamic provisioning | oc get storageclass → one entry marked (default) |
| 5 | Registry access: cdn.redhat.com, registry.redhat.io, quay.io, registry.access.redhat.com, subscription.rhn.redhat.com |
check proxy/firewall |
| 6 | RHOAI Self-Managed subscription attached to the cluster | Red Hat Console |
| 7 | Open Data Hub is not installed | oc get ns \| grep opendatahub → no result |
Why no other operators? In RHOAI 3.x, cert-manager, Kueue, etc. are only required by specific components (KServe, distributed workloads). Since this minimal install enables only
dashboardandworkbenches, the RHOAI Operator itself is the only thing you install.Storage note: Every workbench creates a PersistentVolumeClaim for the user's home directory. Without a working default storage class, workbenches will hang in
Pending.
2. Install the Red Hat OpenShift AI Operator
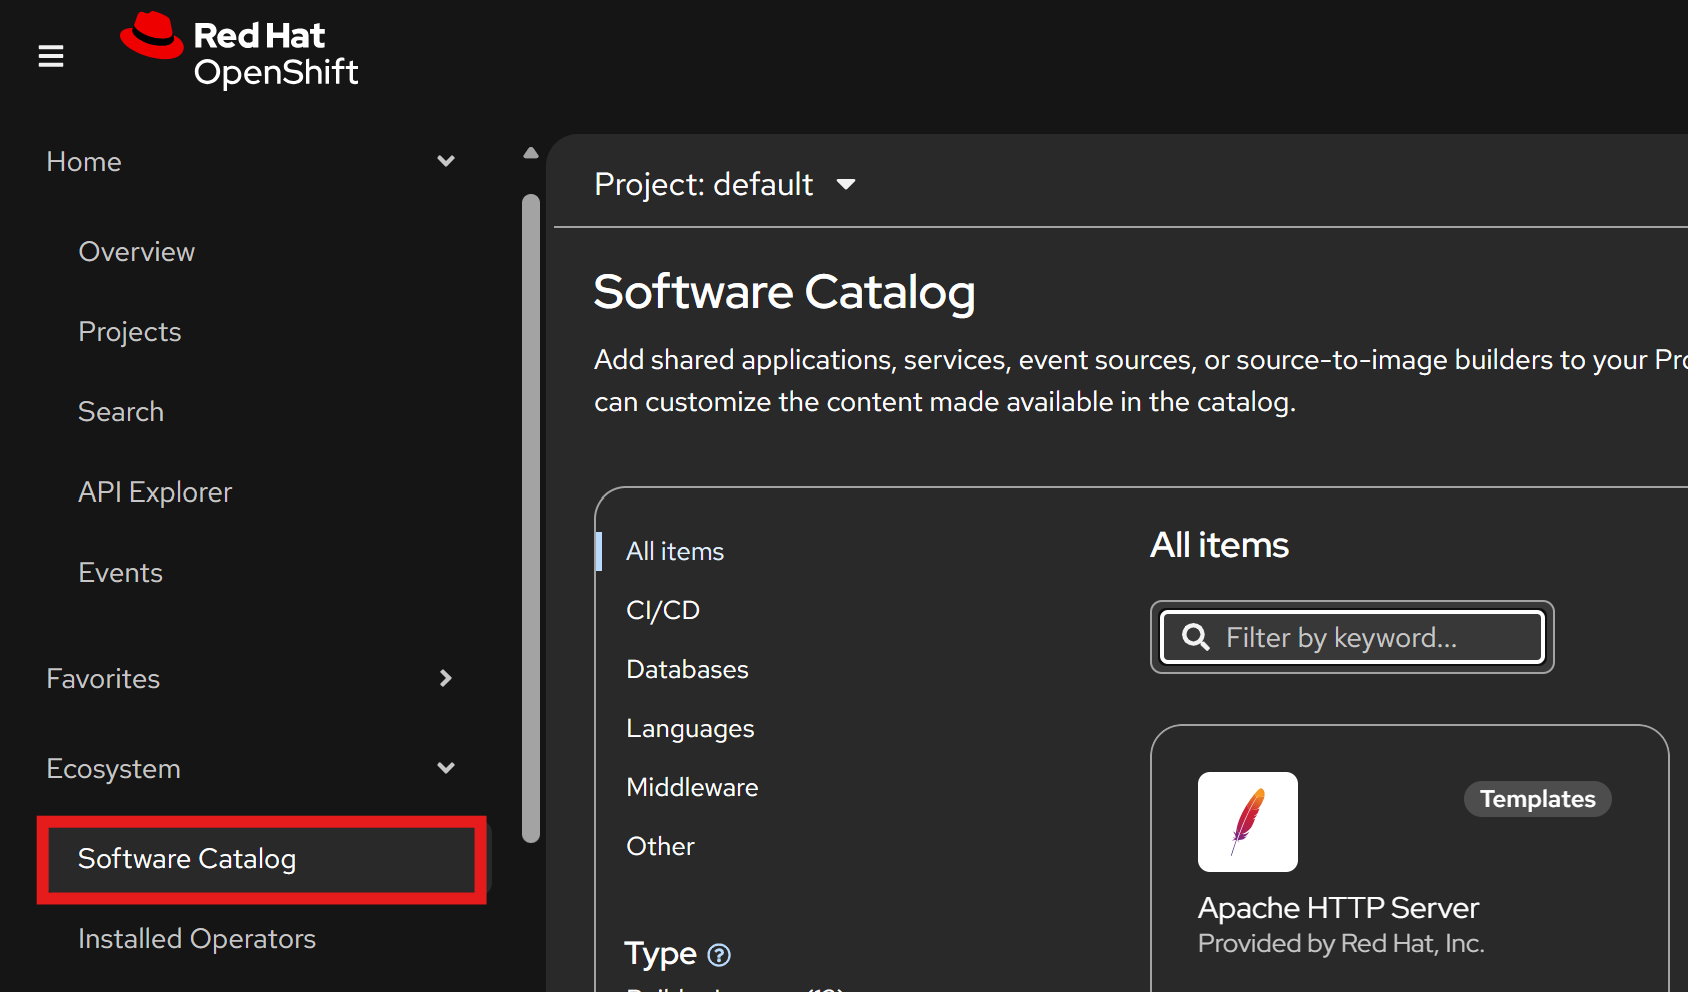
OCP 4.20 navigation change: OperatorHub and the Developer Catalog were merged into a unified Software Catalog under the new Ecosystem menu.
-
Log in to the OpenShift web console as a cluster administrator.
-
Navigate to Ecosystem → Software Catalog.
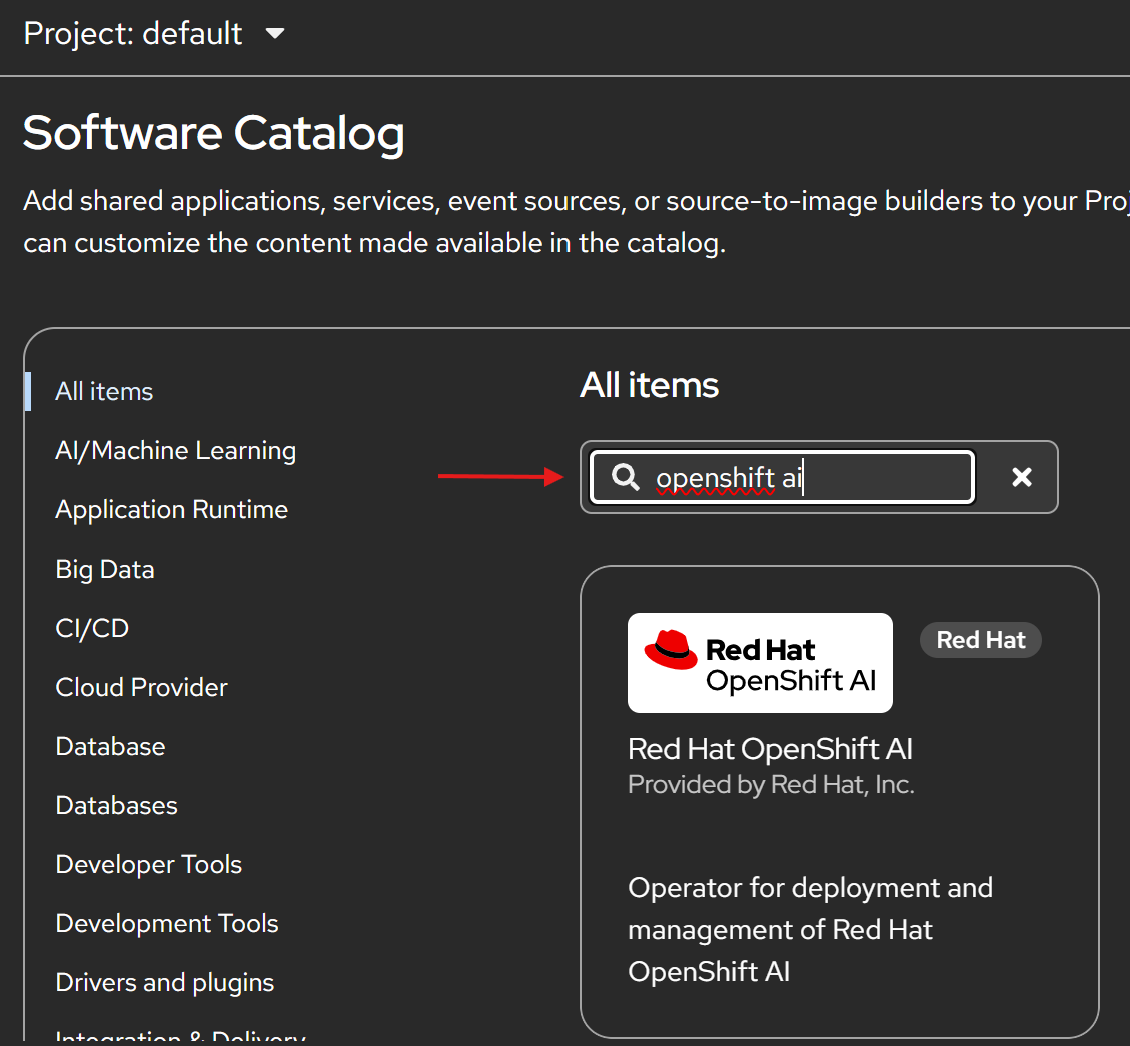
- Under Type, filter for Operators, then type
Red Hat OpenShift AIinto the keyword filter.
-
Click the Red Hat OpenShift AI tile. An information side panel opens.
-
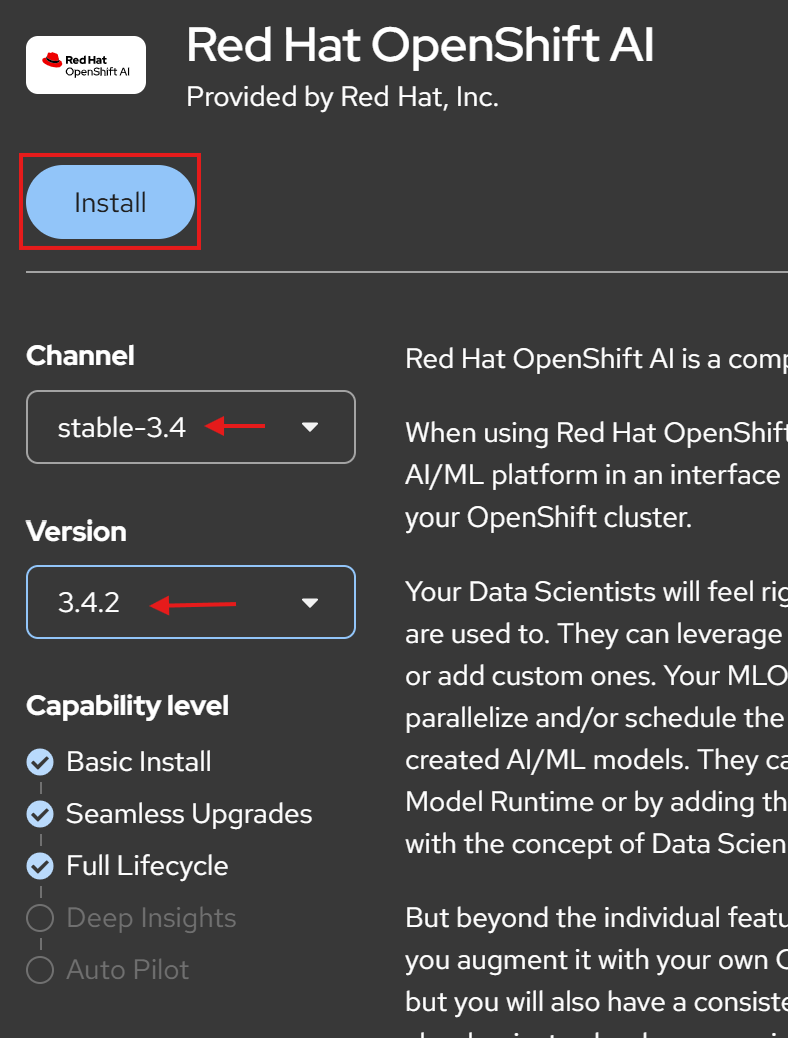
Select:
- Channel:
stable(production) — alternatives:stable-3.4to stay pinned to this minor version,fastfor the newest features. - Version: the latest
3.4.x.
Click Install.
- On the Install Operator page, configure:
| Field | Value | Explanation |
|---|---|---|
| Installation mode | All namespaces on the cluster | only available option |
| Installed Namespace | Operator recommended: redhat-ods-operator |
predefined operator namespace |
| Update approval | Manual (recommended for prod) | RHOAI upgrades sequentially through every intermediate version; with Automatic, OLM immediately walks to the latest release |
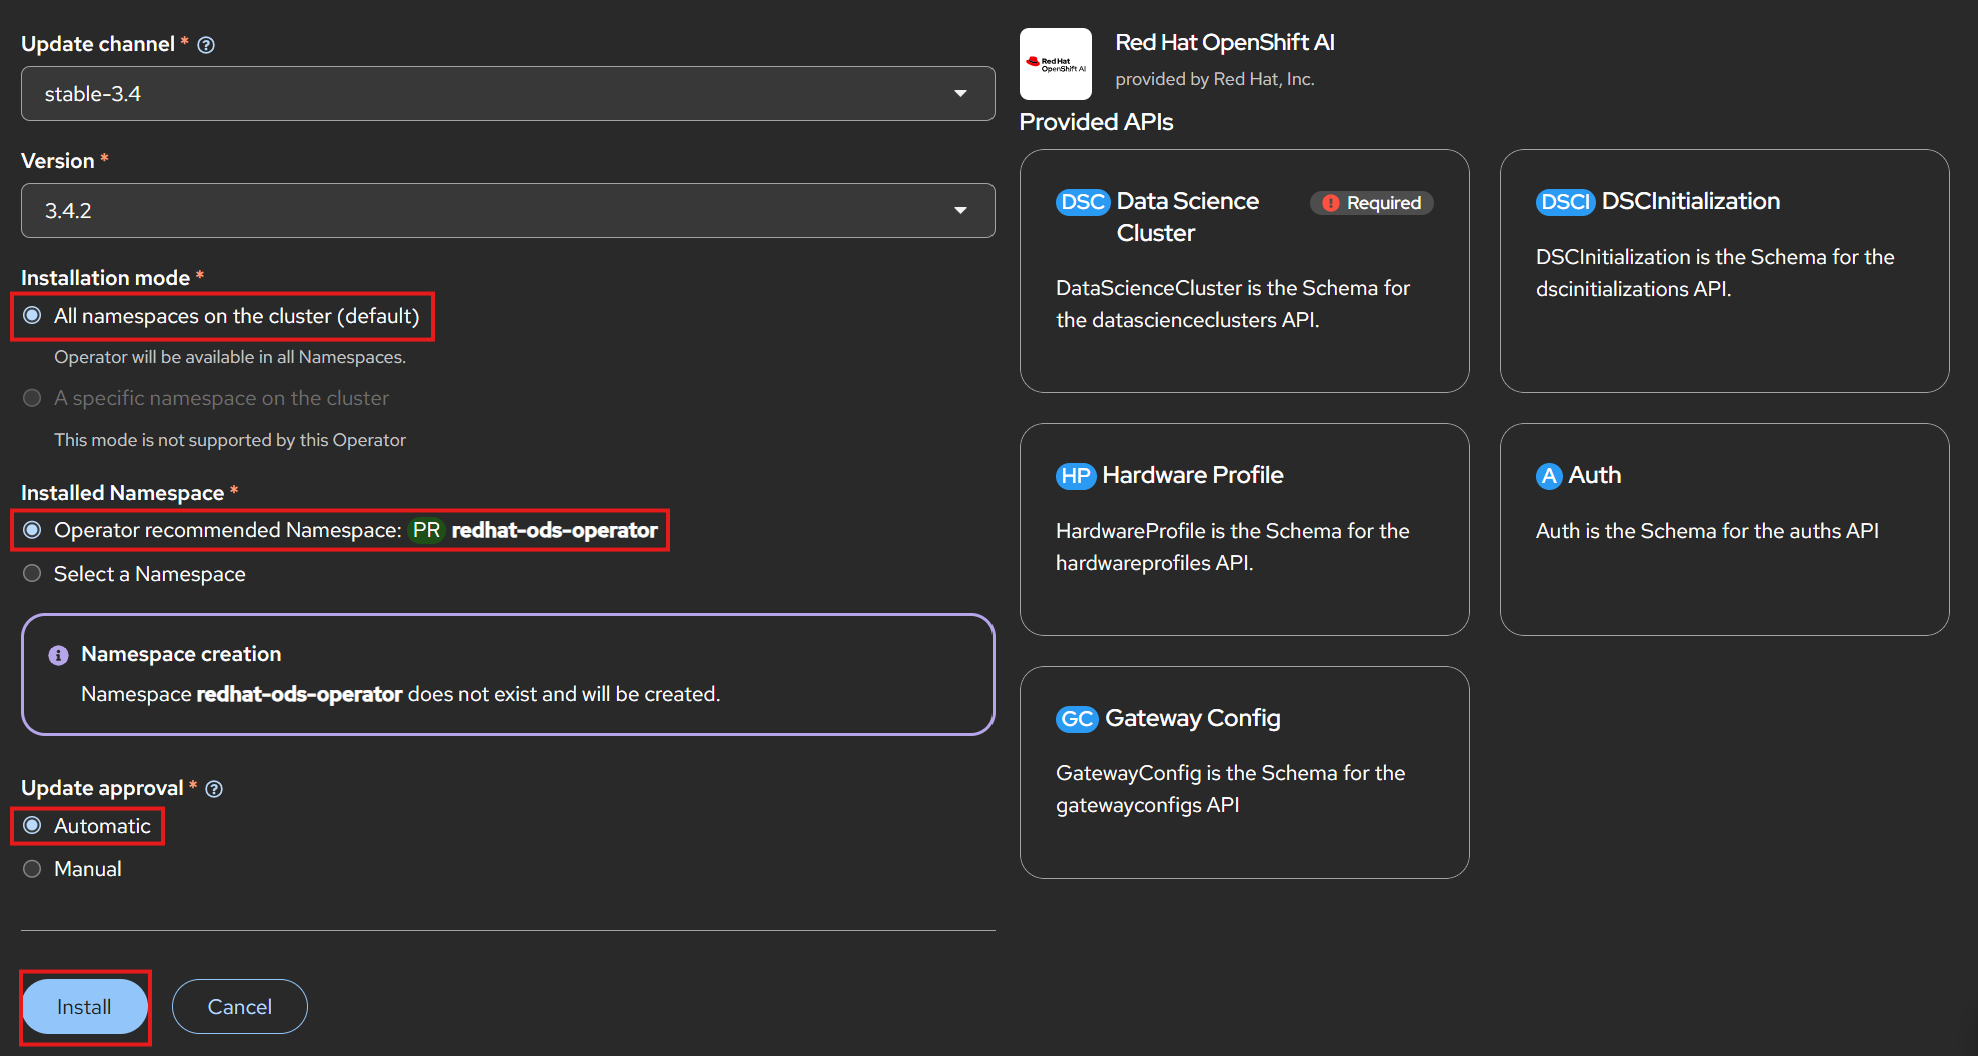
- Click Install and wait until the checkmark appears ("Installed operator: ready for use").
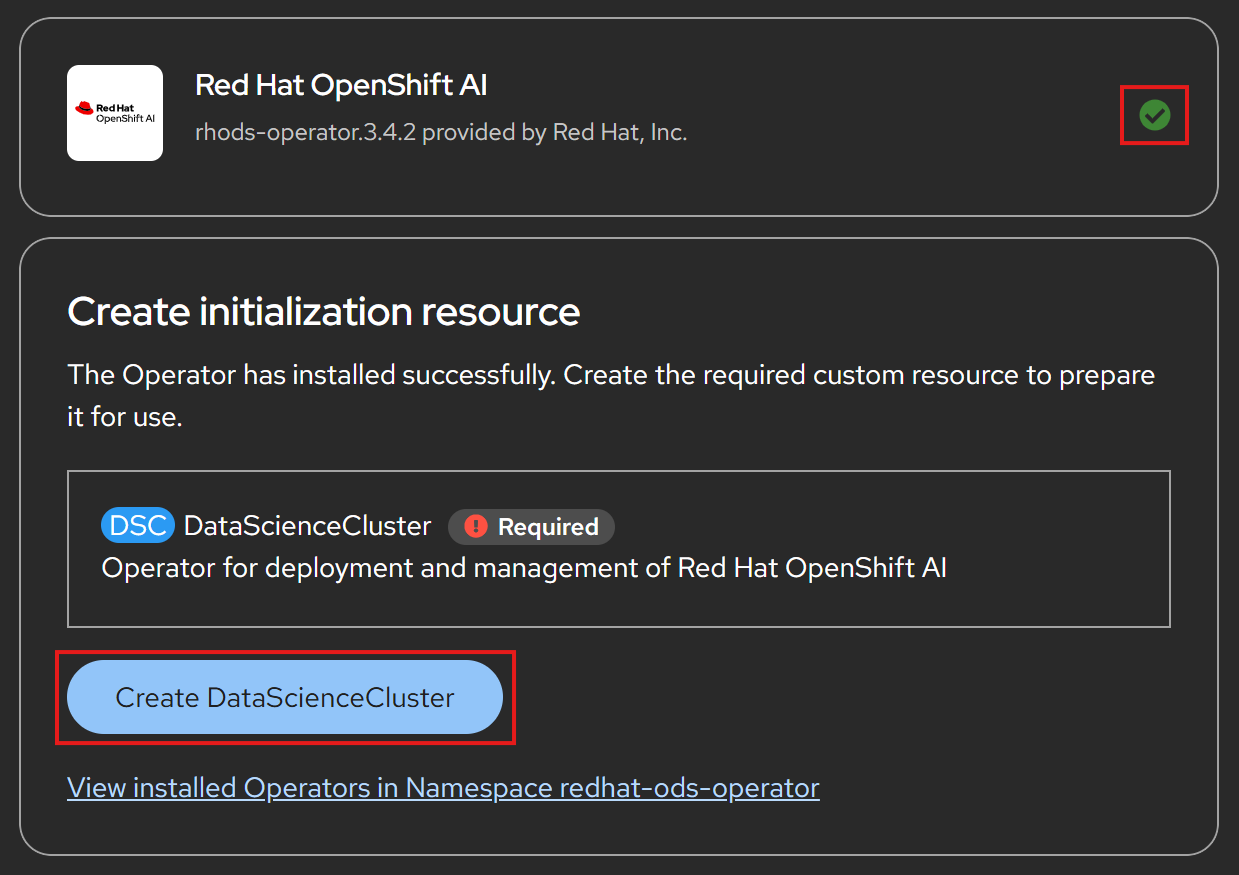
Verification (Optional):
Navigate to Ecosystem → Installed Operators (project: redhat-ods-operator)
and confirm status Succeeded. This can take a few minutes.
Or via CLI:
oc get csv -n redhat-ods-operator
# NAME                    DISPLAY                  PHASE
# rhods-operator.3.4.x    Red Hat OpenShift AI     Succeeded
3. Create the DataScienceCluster (minimal)
The Operator alone installs no user-facing components. Components are enabled
through a DataScienceCluster custom resource. Managed = install and keep
active; Removed = do not install (remove if present).
-
Click on
Create DataScienceClusteror navigate to Ecosystem → Installed Operators → Red Hat OpenShift AI. -
Open the DataScienceCluster tab and click Create DataScienceCluster.
- Switch to YAML view and paste:
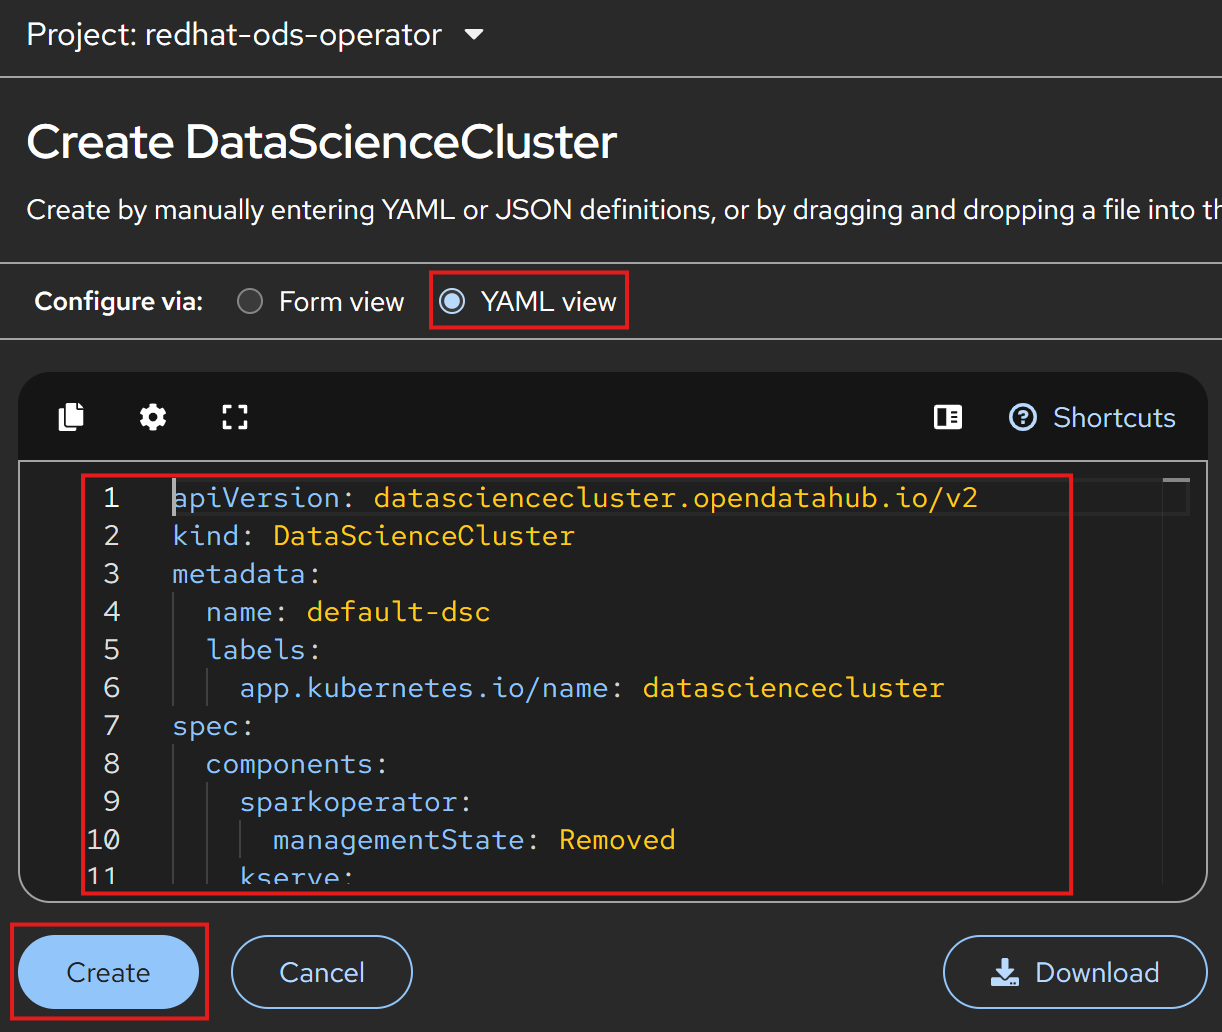
  apiVersion: datasciencecluster.opendatahub.io/v2
  kind: DataScienceCluster
  metadata:
    name: default-dsc
    labels:
      app.kubernetes.io/name: datasciencecluster
  spec:
    components:
      dashboard:
        managementState: Managed
      workbenches:
        workbenchNamespace: rhods-notebooks   # cannot be changed after installation
        managementState: Managed
      kserve:
        managementState: Removed              # enable later; requires cert-manager Operator
        modelsAsService:
          managementState: Removed
        nim:
          airGapped: false
          managementState: Removed
        rawDeploymentServiceConfig: Headless
        wva:
          managementState: Removed
      aipipelines:
        managementState: Removed
        argoWorkflowsControllers:
          managementState: Removed
      modelregistry:
        registriesNamespace: rhoai-model-registries
        managementState: Removed
      llamastackoperator:
        managementState: Removed
      feastoperator:
        managementState: Removed
      trustyai:
        managementState: Removed
        eval:
          lmeval:
            permitCodeExecution: deny
            permitOnline: deny
        mcpGuardrailsMode: false
      kueue:
        defaultClusterQueueName: default
        defaultLocalQueueName: default
        managementState: Removed
      ray:
        managementState: Removed
      trainer:
        managementState: Removed
      trainingoperator:
        managementState: Removed
      sparkoperator:
        managementState: Removed
      mlflowoperator:
        managementState: Removed
Notes:
- apiVersion: .../v2 is the 3.x schema (2.x used v1).
- workbenchNamespace only affects standalone/basic workbenches
(the Jupyter tile). Project workbenches always run in their own
data science project namespace. This value cannot be changed after
installation.
- Fields under Removed components (e.g. registriesNamespace) are
inert but kept for schema completeness.
- Click Create.
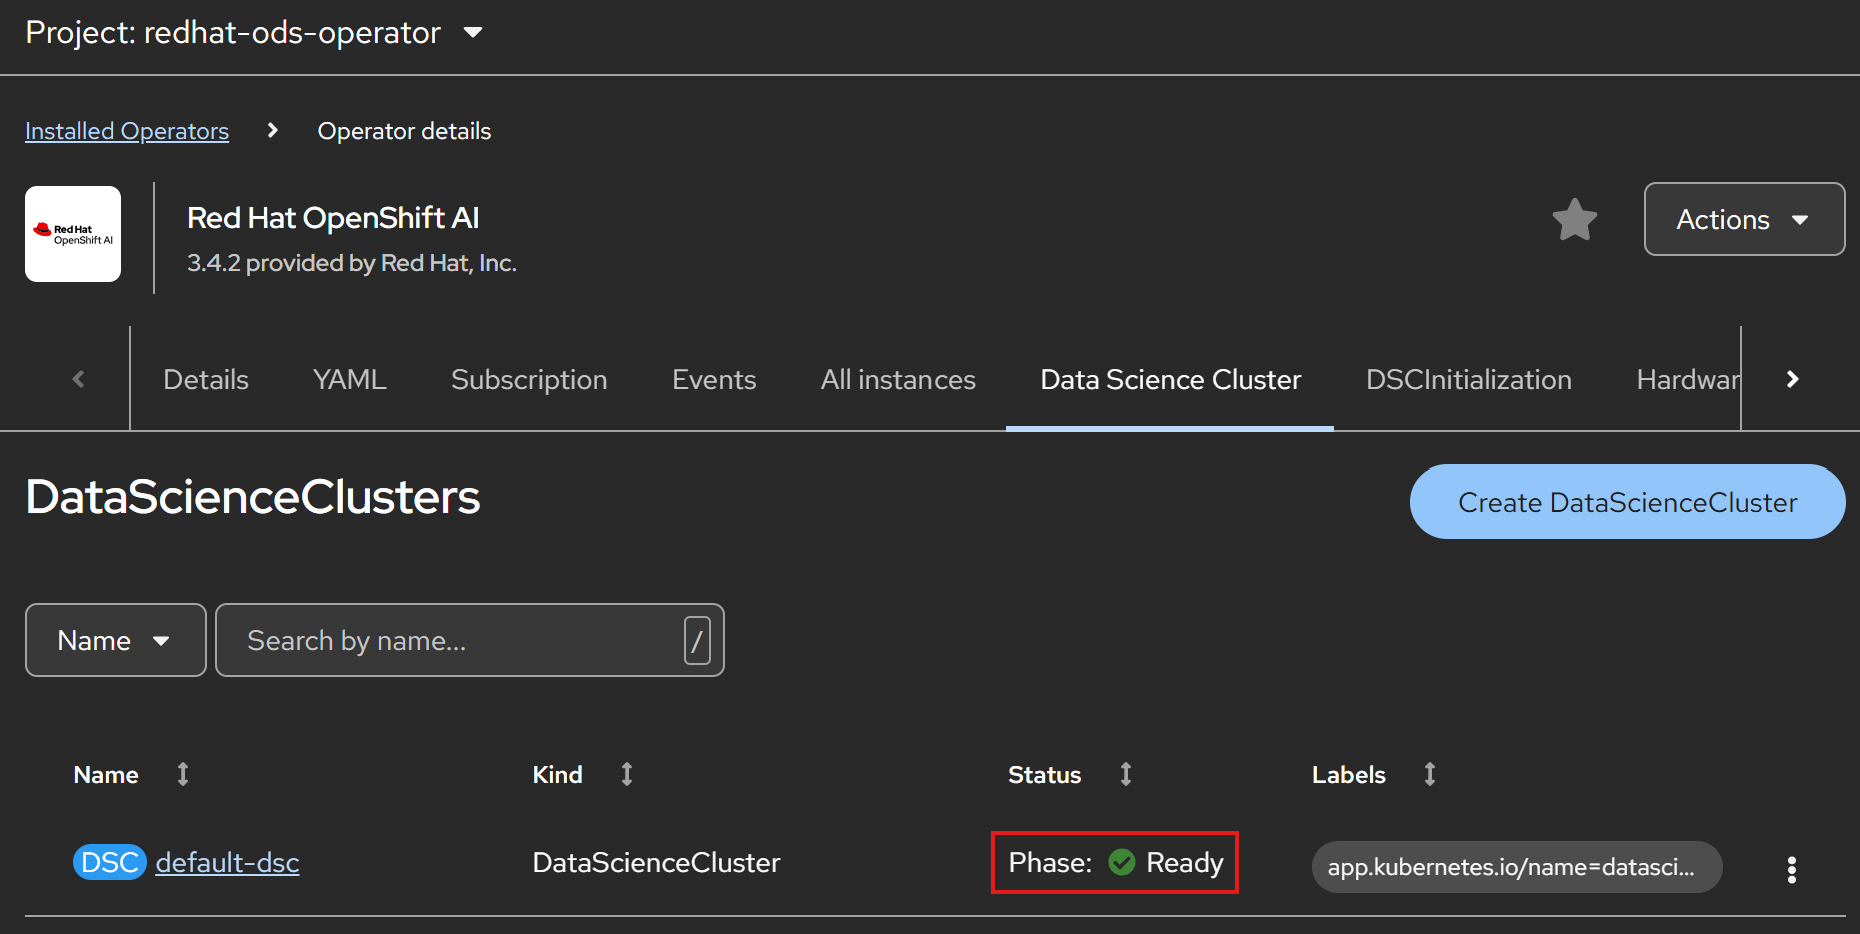
Verification:
# DSC should reach phase "Ready" (1–3 minutes):
oc get datasciencecluster default-dsc

# Expected pods in the applications namespace:
oc get pods -n redhat-ods-applications
# rhods-dashboard-...          Running
# notebook-controller-...      Running
# odh-notebook-controller-...  Running
4. Access the Dashboard
Option A — Application launcher (easiest):
In the OpenShift web console, click the application launcher icon (⋮⋮⋮ grid symbol, top right corner) and select Red Hat OpenShift AI.
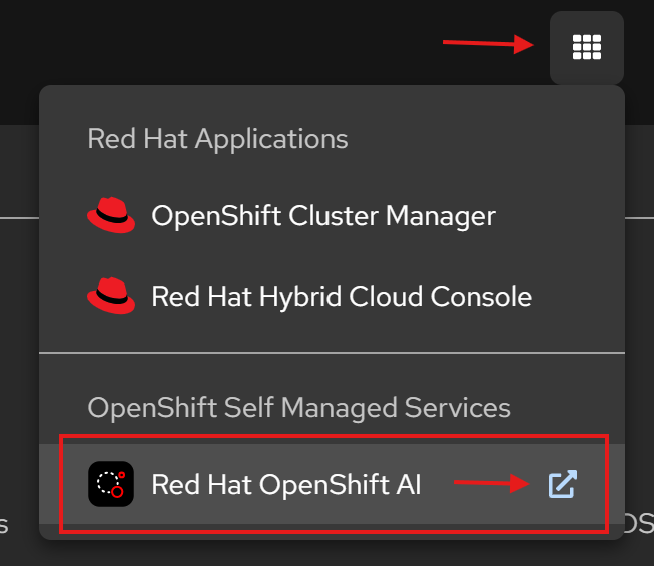
The entry appears automatically once the dashboard component is deployed. If it's missing, the dashboard pod is not ready yet — see Section 7.
Option B — Route via CLI:
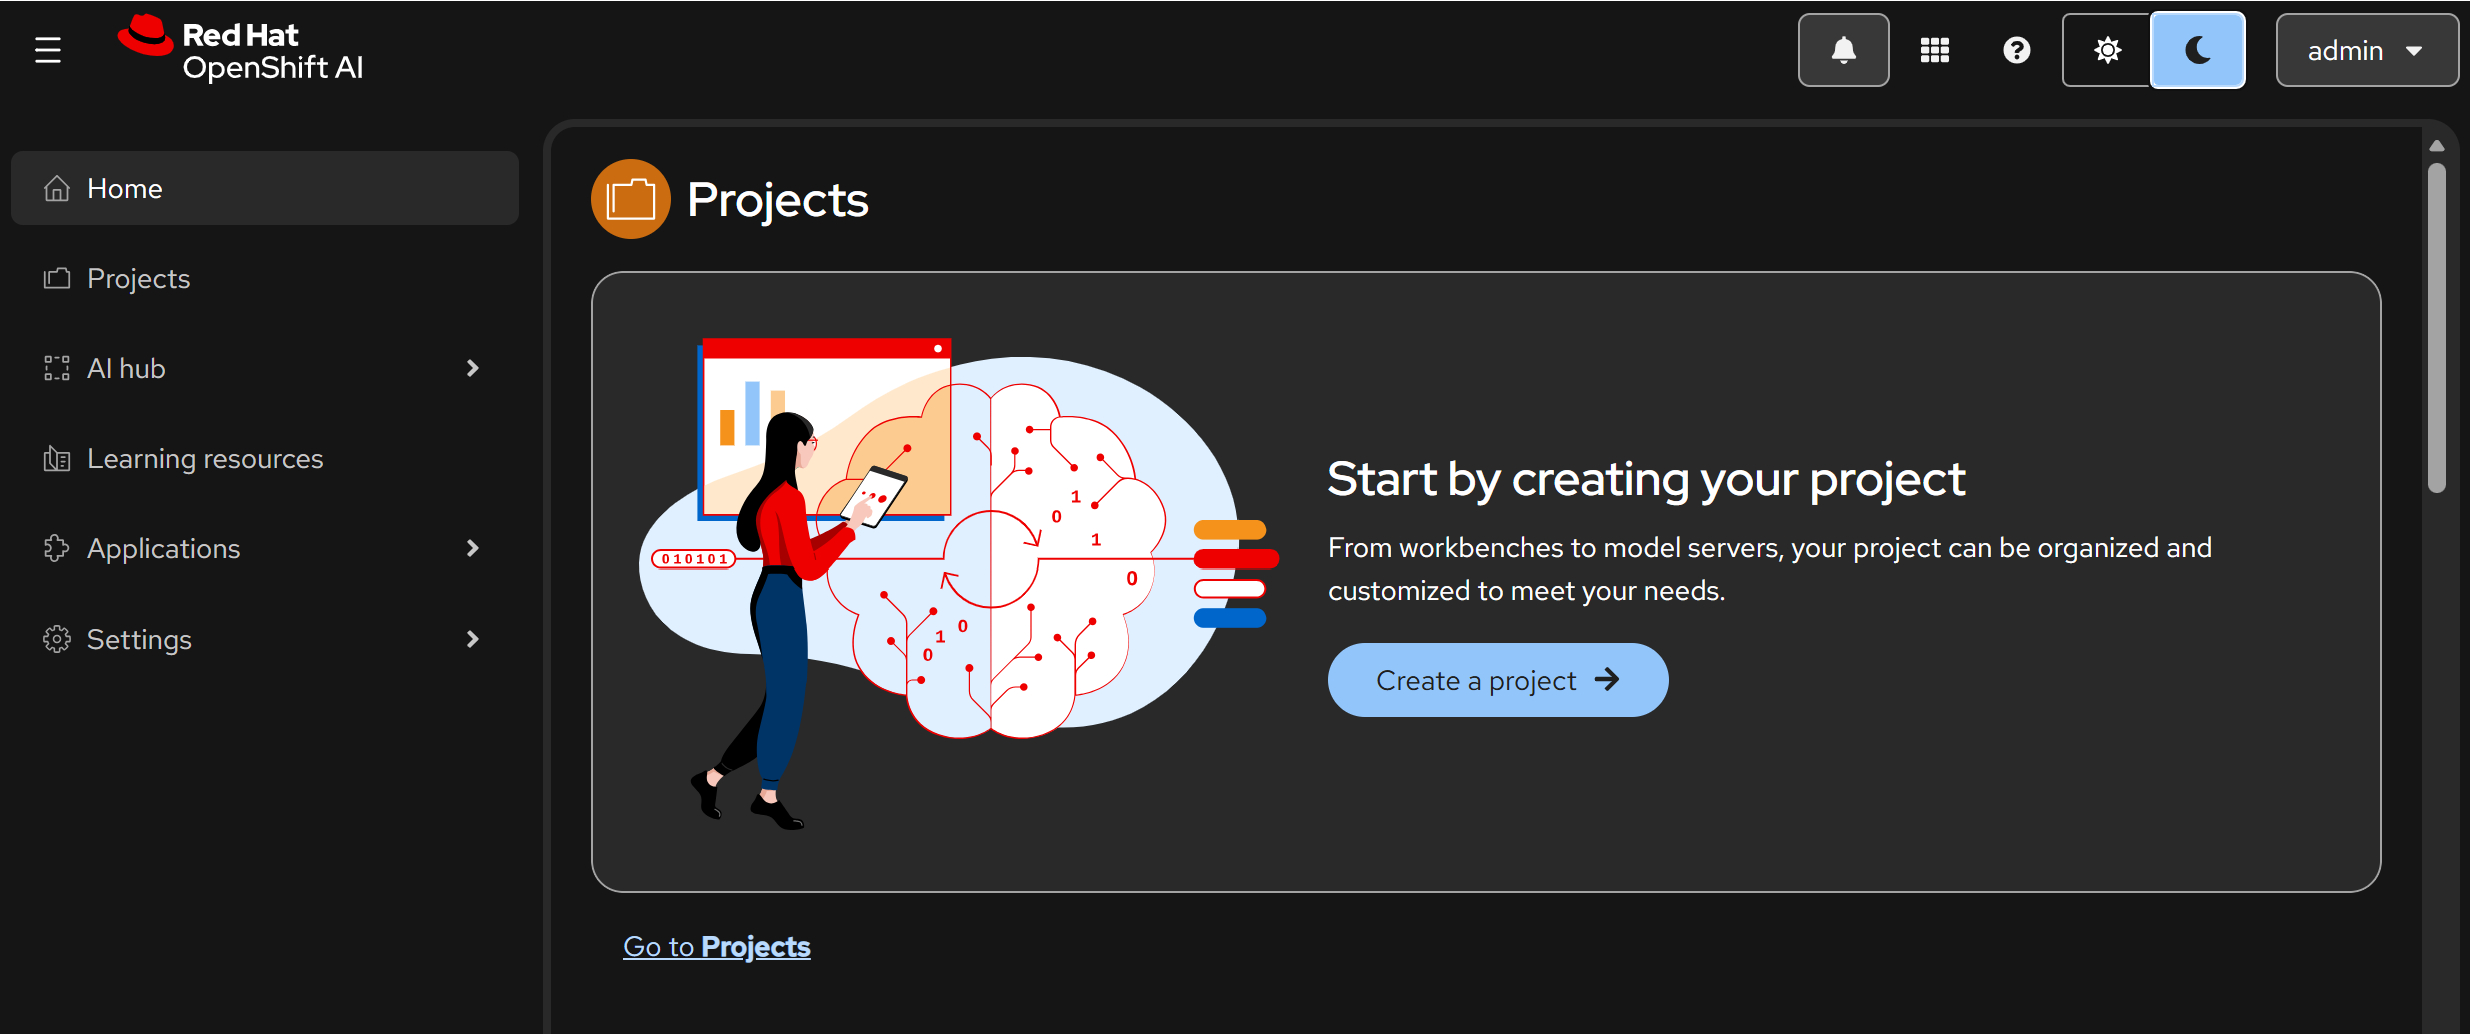
Open the URL in a browser and log in with your OpenShift identity provider credentials.
5. Troubleshooting quick reference
| Symptom | Likely cause | Fix |
|---|---|---|
| Operator stuck in Installing | catalog/registry unreachable | check access to registry.redhat.io; oc get catalogsource -n openshift-marketplace |
DSC not Ready |
component error | oc describe datasciencecluster default-dsc → Conditions |
Workbench PVC Pending |
no default storage class | oc get storageclass, set a default |
| Dashboard route 503 | dashboard pod not ready | oc get pods -n redhat-ods-applications |
| Login works but dashboard empty/forbidden | user not in RHOAI user group | Section 5 |
6. Enabling components later (outlook)
Components can be flipped to Managed at any time — no reinstall needed.
Example for model serving (requires cert-manager Operator first):
oc patch datasciencecluster default-dsc --type merge \
  -p '{"spec":{"components":{"kserve":{"managementState":"Managed"}}}}'
| Component | Prerequisite operators |
|---|---|
kserve |
cert-manager |
| llm-d (advanced kserve) | cert-manager, Connectivity Link, Leader Worker Set |
kueue, ray, trainingoperator |
Red Hat build of Kueue, cert-manager |
| GPU workbenches | Node Feature Discovery + NVIDIA GPU Operator (no DSC change needed) |
References - Installing and uninstalling OpenShift AI Self-Managed 3.4 - Supported Configurations for RHOAI 3.x